Culture | Design | Food | The perfect ten
Ten tips for painting food by Anna Koska

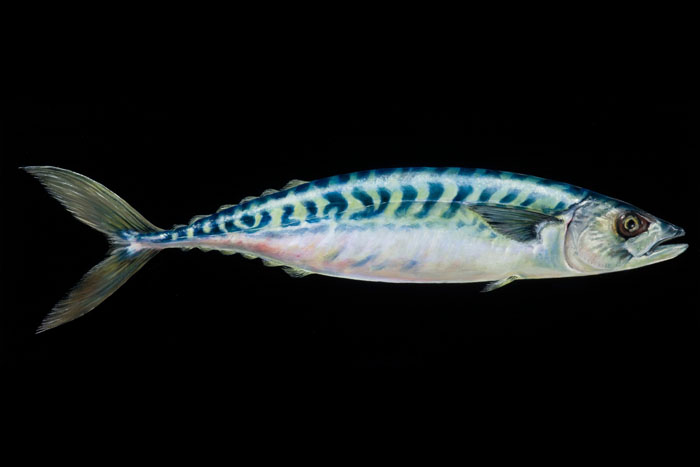
- GO AND FIND THE REAL THING – There are limits to this of course. In the case of some obscure fish, I’m not often in a position to don a wetsuit and jump in the deep if it lives at the bottom of the inky blue, but there’s always a fish market.
- HANDLE THE THING – If it’s got bones, feel where they lie. If it’s got skin, get familiar with the feel and texture: hairy, bald, feathery, scaly, bit gooey, slippery, a bit want-to-put-it-down-and-run. Move it around. Check out the way the shadows play on the dips and curves.
- TAKE IT HOME TO MEET THE FAMILY – If I can buy it and fit it in the car then I will bring it back home. There I can do sketches, take stock photos of proportions, detail and colours.
- COLOURS CAN FADE – Photos are important for colour reference. Your photos, not stock ones from a website. Stock photos can help, but the liberal pressing of the “enhance” button by some keen photo editor usually results in a distorted colour range! There are exceptions: Brussel sprouts really are flouro-green.
- YOU NEED A FREEZER – Chest ones are best. In amongst joints of unlabelled (they fell off) beasties, I have a few whole and named beasties including the odd gurnard and mackerel. When I’m illustrating fish, or indeed anything that once walked, swam or pranced, I tend to pop them, bagged, in the freezer. I can then haul them out to check the odd detail if necessary. (Extra tip: make sure you keep your feet on the ground when bending over into the chest freezer…)
- PERFUME IS IMPORTANT – Choose one you can stomach at close proximity. My current favourite is Penhaligons Blenheim Bouquet. Anything zingy is good. This is used to spray the thing that once walked, swam, pranced. It stops the studio smelling like an A level Biology lab during dissection practice.
- EXPERIENCE THE FOOD – You’ve got to have eaten the thing you’re illustrating. Obviously. You can’t expect to portray this as an edible, lustworthy food if you’ve no sense of the taste, texture and soul of the food.
- KEEP YOUR DISTANCE – Keep ‘helpful’ people (not just children)/waggling paintbrushes/colour felt tips/food dipped appendages, at a distance.
- TALKING OF HANDS – During my probationary period of illustrating I recall many traumatic moments trying remove beautifully immaculate hand profile prints concocted with a fabulous array of mixed media, including fish scales, lead pencil, water colour, with the occasional smear of Maltesers crumbs to add texture. Through excessive hand washing I now enjoy hands of a 70 year old, but it was worth it.
- REWARDS – There has to be rewards. This is a small selection of what makes me very happy: fresh figs, salted caramels, Chase Marmalade Vodka, my bicycle.


One Comment